HRPT Weather Satellites
It is something of a rite of passage for Amateur Radio Enthusiasts to build an antenna and to receive images from overhead passing weather satellites.
The usual way to do this as a beginner is to build a 137Mhz dipole and (at least in Europe) stand in the garden and capture the NOAA satellites.
This approach is common, well documented, and approachable with fairly standard hardware. It can be achieved with a $15 Quansheng hand held radio and a couple of phone apps.
This is not how I did it.
HRPT
I tried the VHF / 137Mhz approach a couple of times, even going as far as ordering some aluminium rod to build a permanent antenna. I didn’t have a huge amount of success - mostly because I hadn’t quite understood what the tracking meant and how to work out when the satellite was overhead and in which direction it was facing.
However, there is another way.
Most of the satelllites also broadcast what is known as HRPT. This is the same sensor data but on a higher frequency and therefore with more bandwidth and less compression. The resolution is the same as VHF / LRPT (around 1 pixel per 1.1km) but you end up with a higher quality picture due to the lower compression.
This does start requiring a lot more specialised equipment. Fortunately, over the last 5 years this has started to become fairly attainable and at least doesn’t require modifications or custom builds any longer.
Antenna
The first thing you’ll need for HRPT is an antenna. We’re now up in the L-Band at around 1.7Ghz so it’s a bit beyond ’two bits of aluminium rod and some coax’. There’s a few ways to do this. The ideal is an actual satellite dish of the correct size with a receiver. That is unfortunately a bit awkward to both obtain and to store.
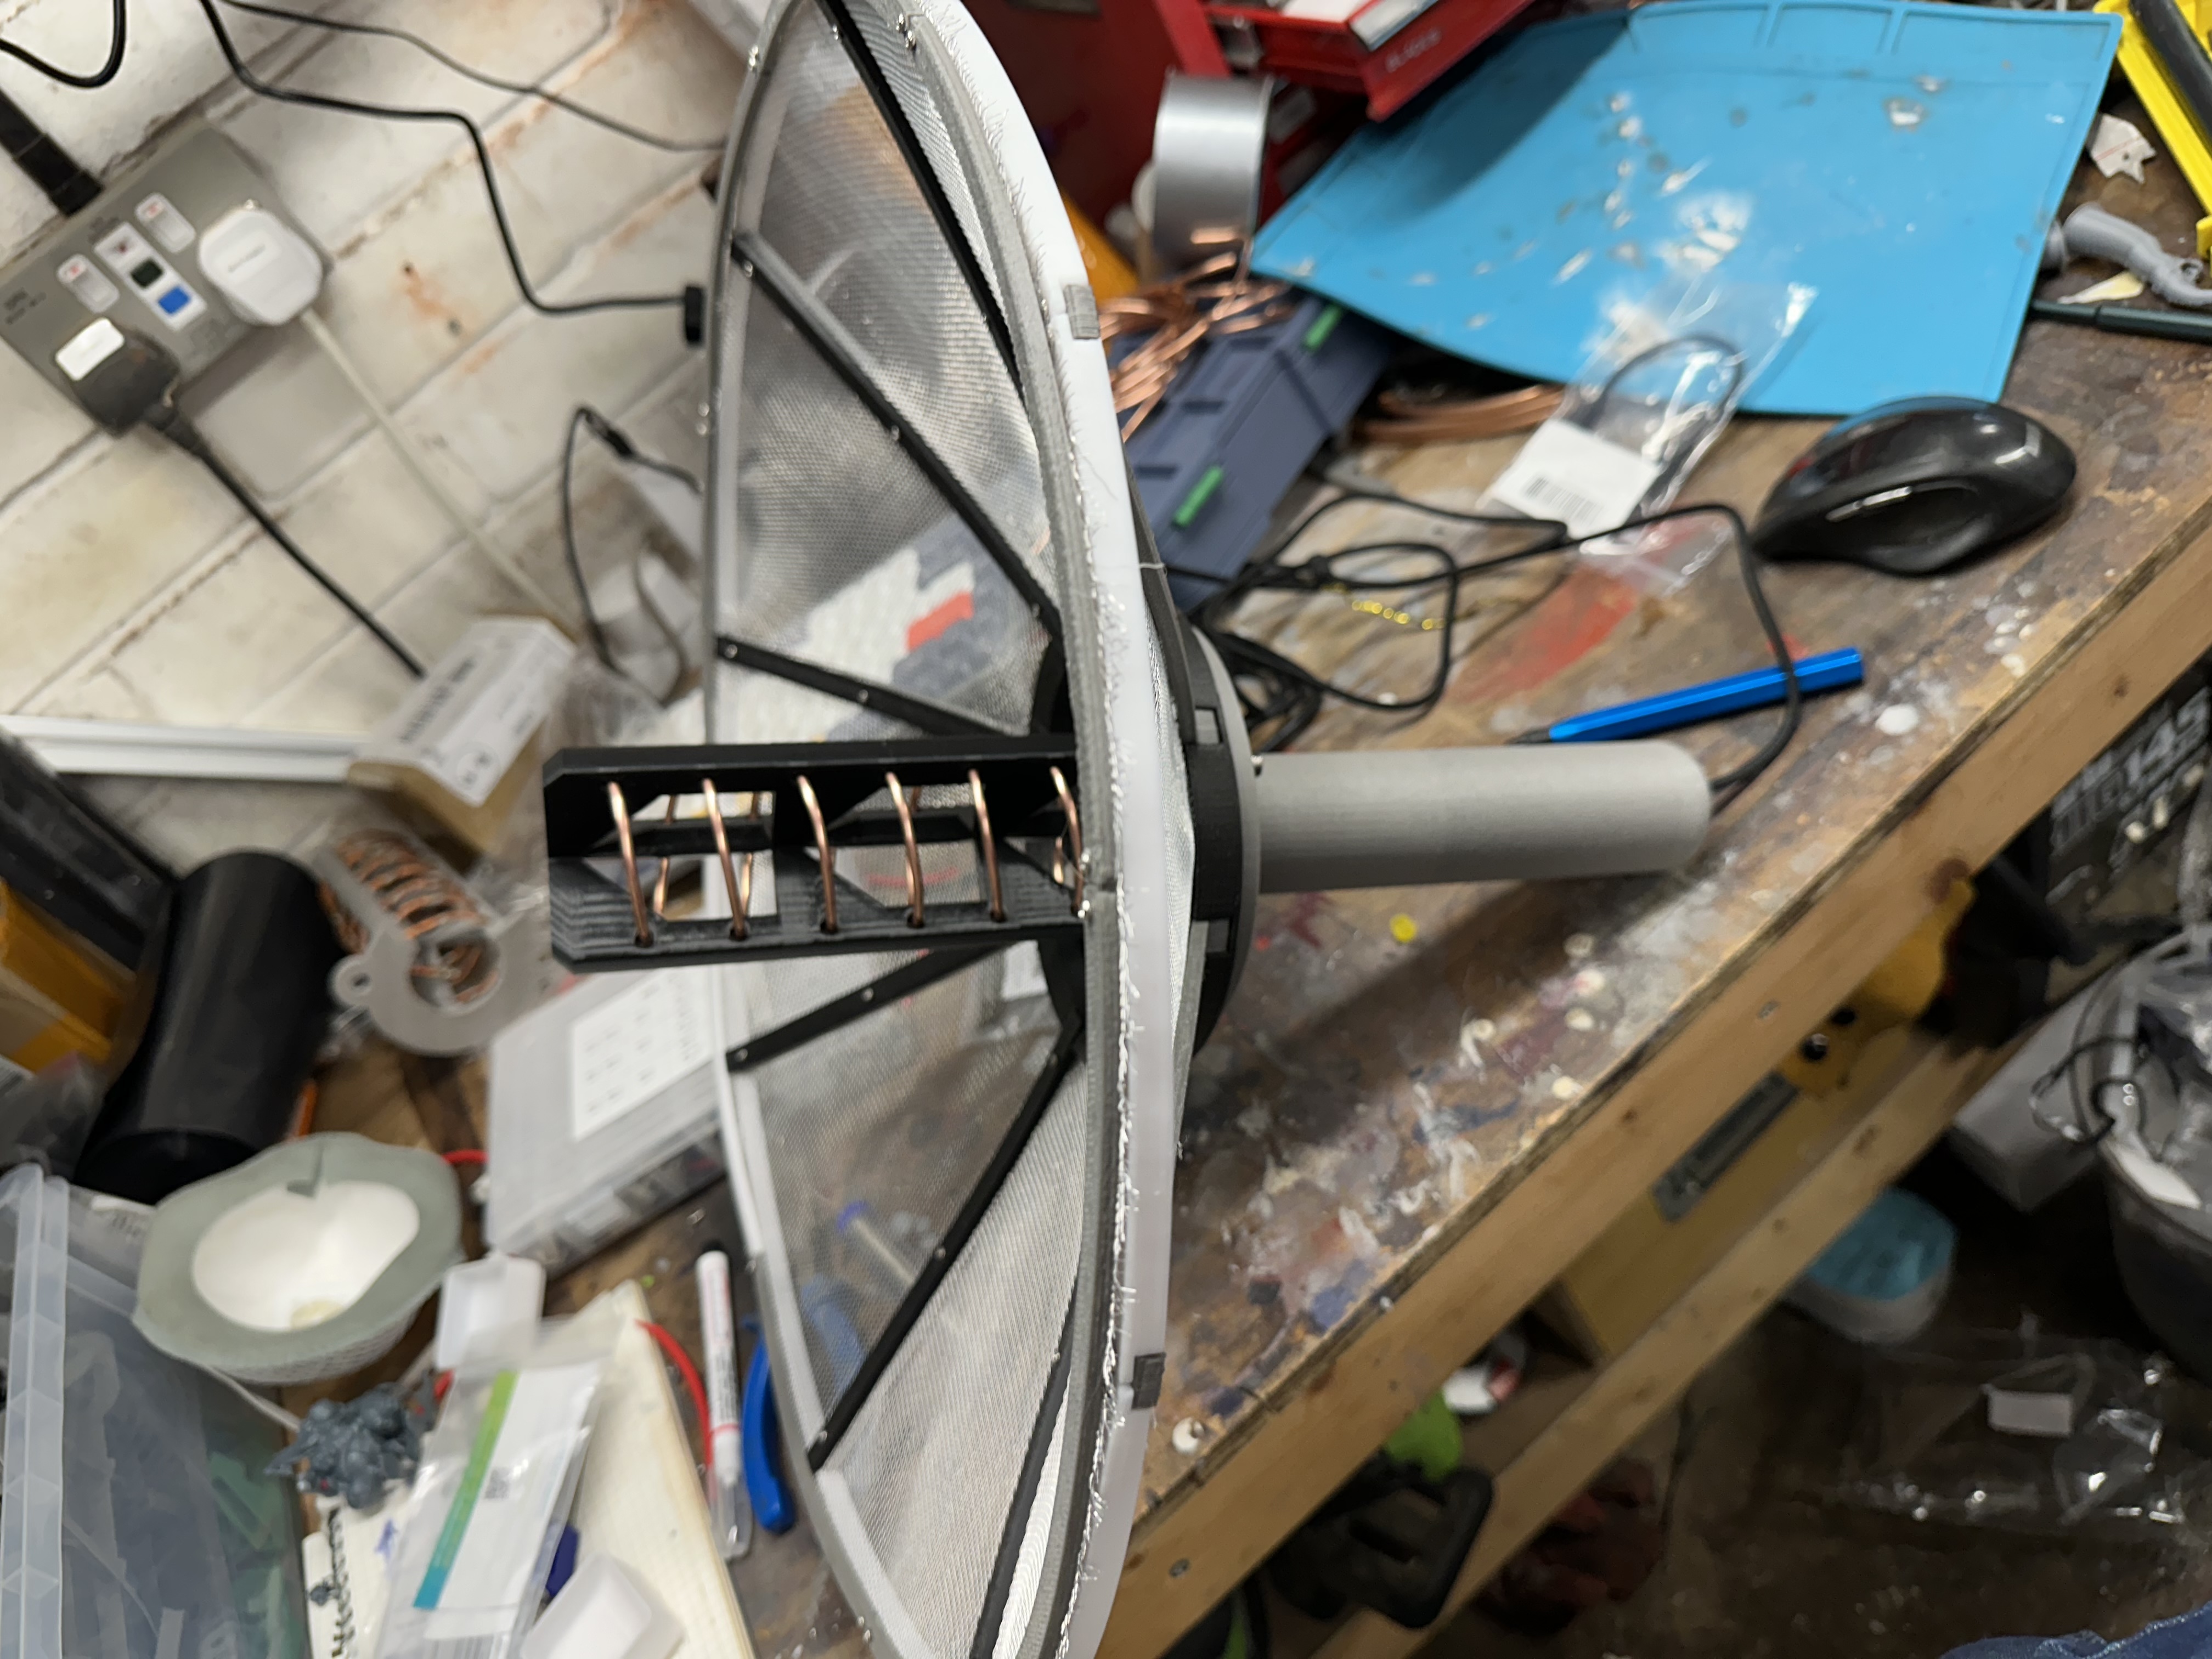
Instead, Mark from the #satellites channel on the OARC Discord recommended a 3d printable helicone antenna that is both lightweight, small, and intended for this operation. This is ideal as it’s smaller and lighter - you’re going to have to stand in an open space and wave this around for sometimes upwards of 15 minutes. Things can get quite heavy by then.
I printed the parts, though I used this remix for the main feed as it prints slightly easier without supports.
It’s worth noting that you need to pay attention to the orientation of the supports for the cone. At least for me in OrcaSlicer they loaded upside down and I didn’t notice, leading to some failed prints as the small overlaps ended up printing in free space.
Assembling the antenna was pretty straightforward following the PDF guide attached to the thingiverse downloads. I never managed to get the center screws for the round bracing in, thye collided with the screws beneath them. I suspect I got something wrong somewhere, but it works fine as it is.
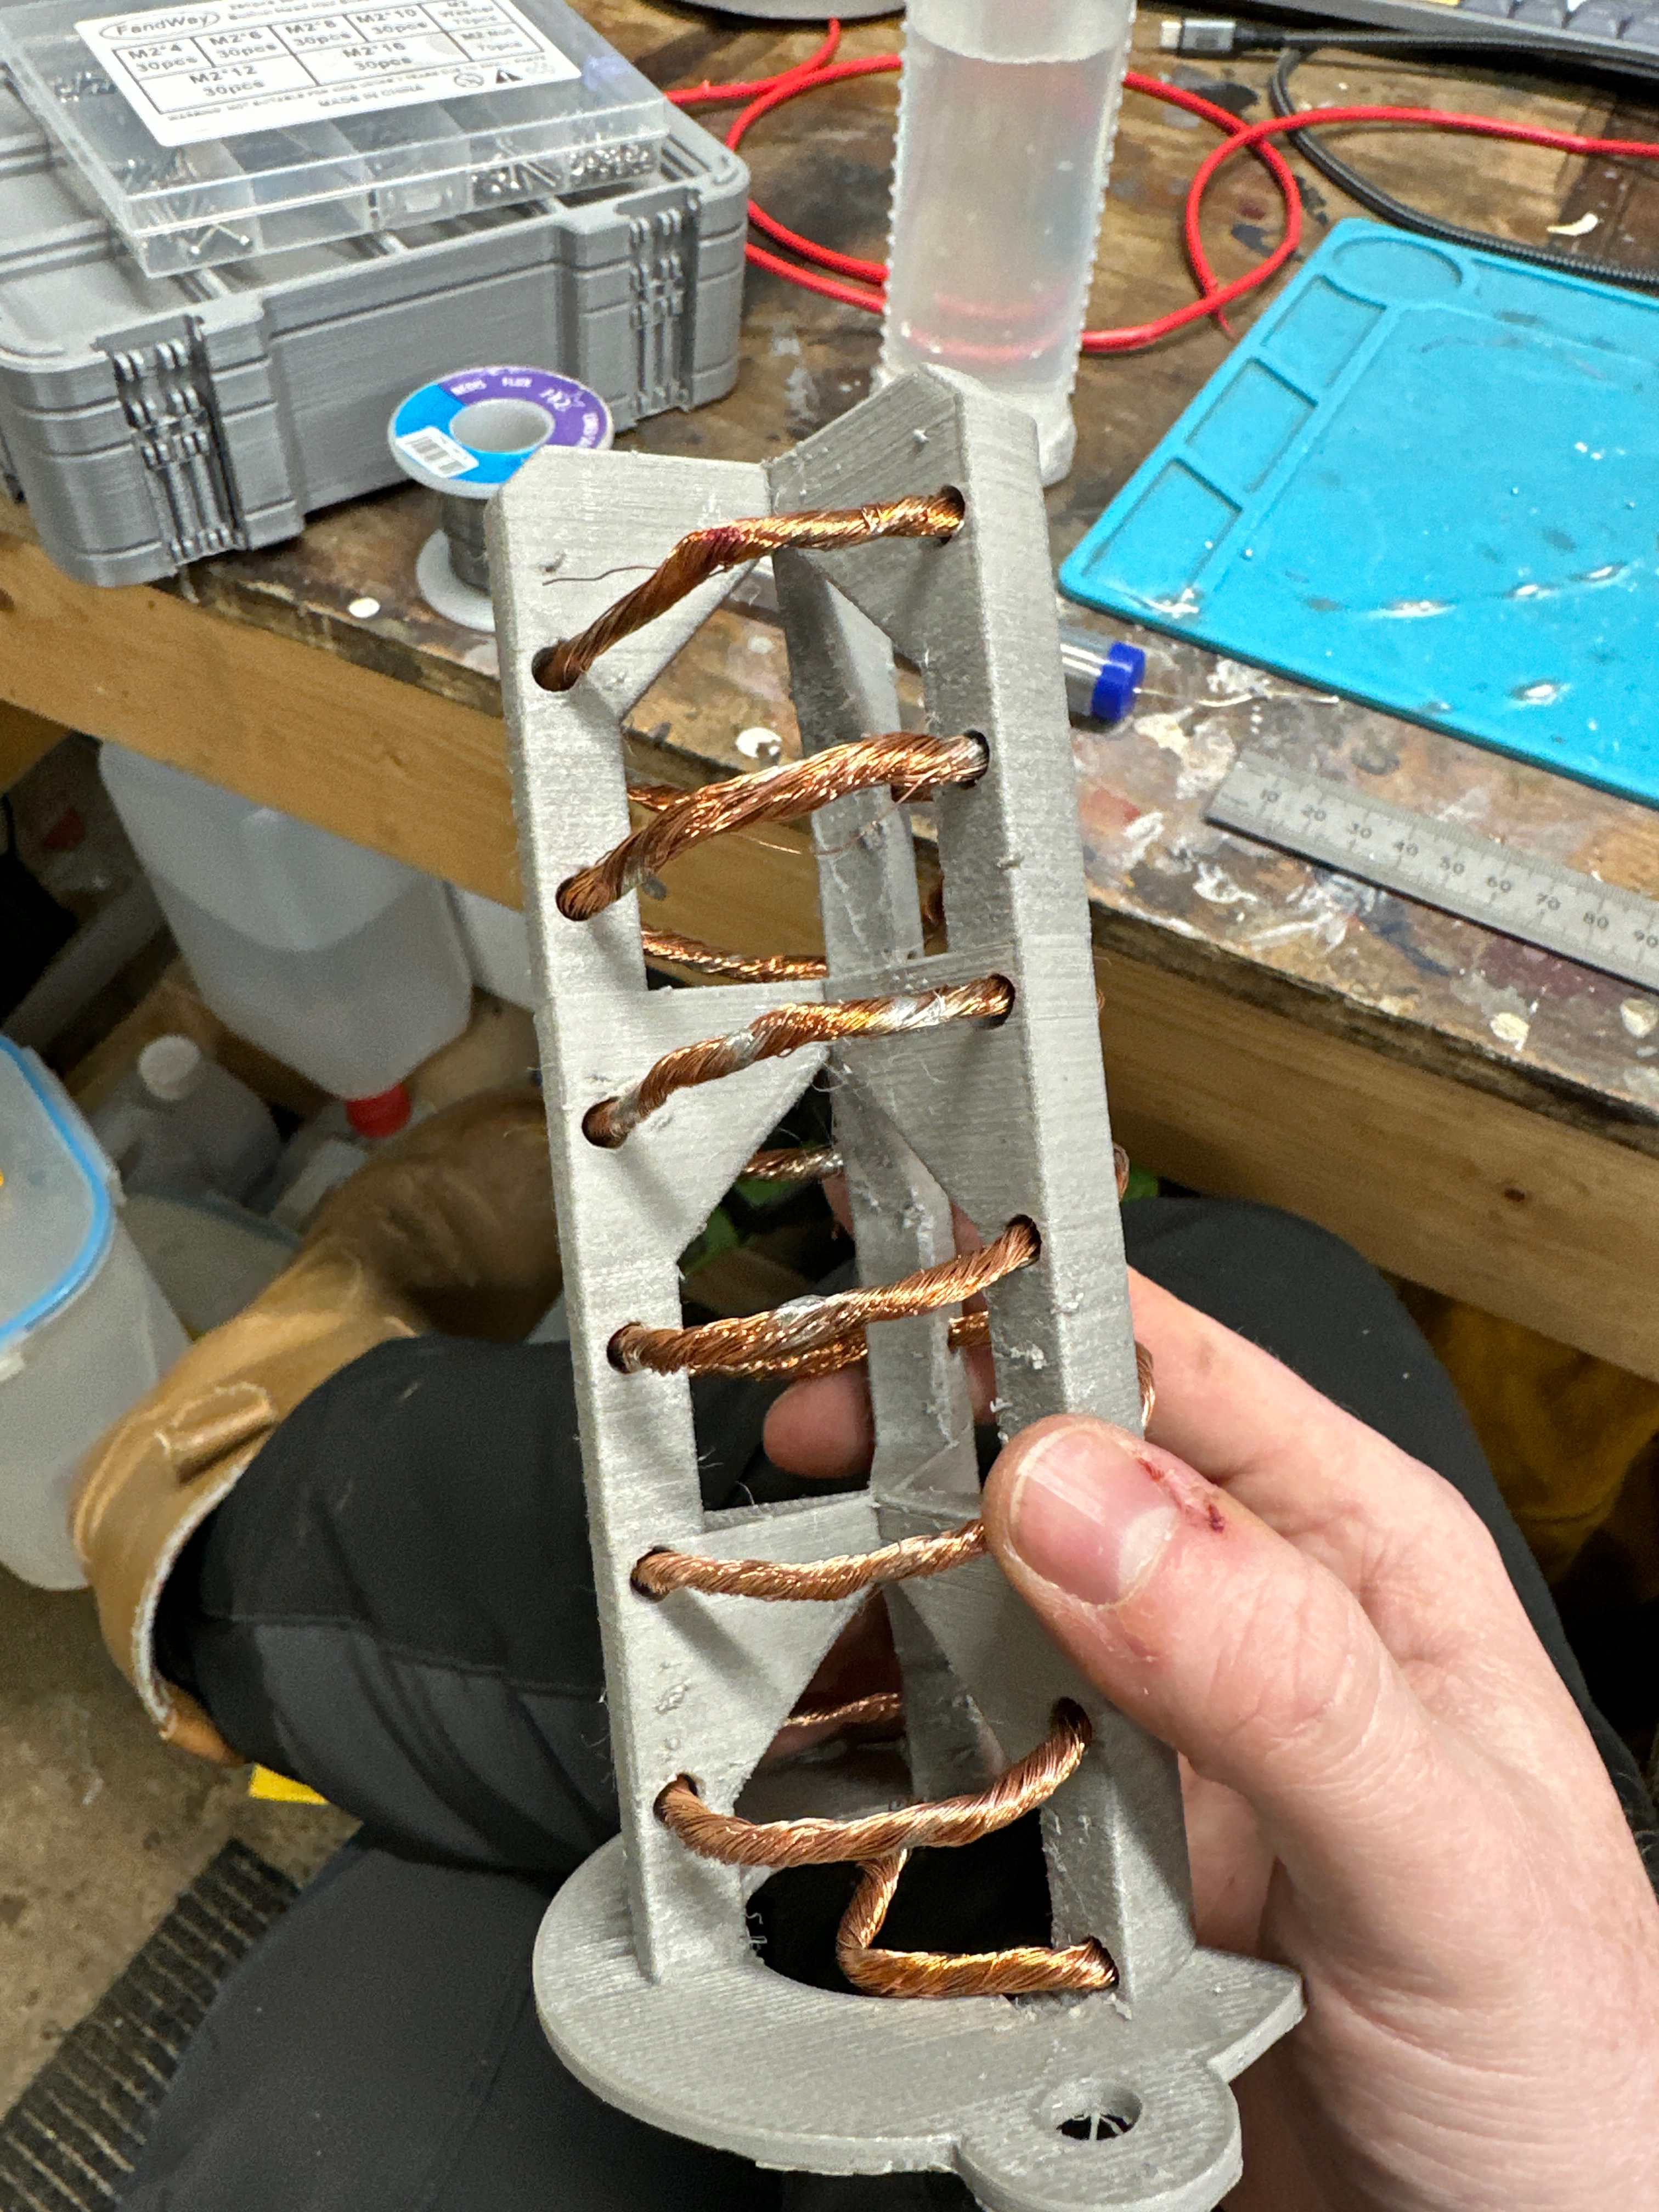
Measuring out the wire is probably the hardest part as it moves while you’re trying to cut it and a 53cm square section ended up being very not square by the time I’d finished it. Attaching it to the cone went okay however.
Sourcing the wire for the helix was perhaps the hardest part of the entire process, see the BOM below for what I ended up using.
I did end try using a twisted multicore wire instead of the solid core. The general response was ‘oh no, my eyes, please take it away’. One day I’ll actually test that, but for now I think I’ll just stick with the second build.
Electronics
Unusually, I decided to make my life easier for this aspect and just ordered the Nooelec Sawbird GOES+ LNA and NooElec NESDR SMArTee XTR SDR. The SDR provides ‘bias tee’, or power, to the LNA (Low Noise Amplifier), so you can just plug one into the other and then the LNA into the SMA mount from the antenna. Long USB extension in the other and away you go.
Software
By far the easiest single software solution is SatDump. This can do capture, record, and analysis of the signals all within the same application. Other separated applications may be used if you prefer or need different features.
There are many guides on configuring SatDump, but what works for me for this is: Gain: 25 Bias Tee: Enabled (in theory this is always enabled with the SMArTee, but better safe tha sorry). Sample Rate: 2.56Mbps (possibly not enough for MetOp satellites)
I then configured autotrack scheduling with the following satellites, set for 20 degree elevation minimum (I live in a valley):
- NOAA 18
- NOAA 19
- Meteor M2-3
- Meteor M2-4
- MetOp B
- MetOp C
Loading that up with passes gave me the overhead times.

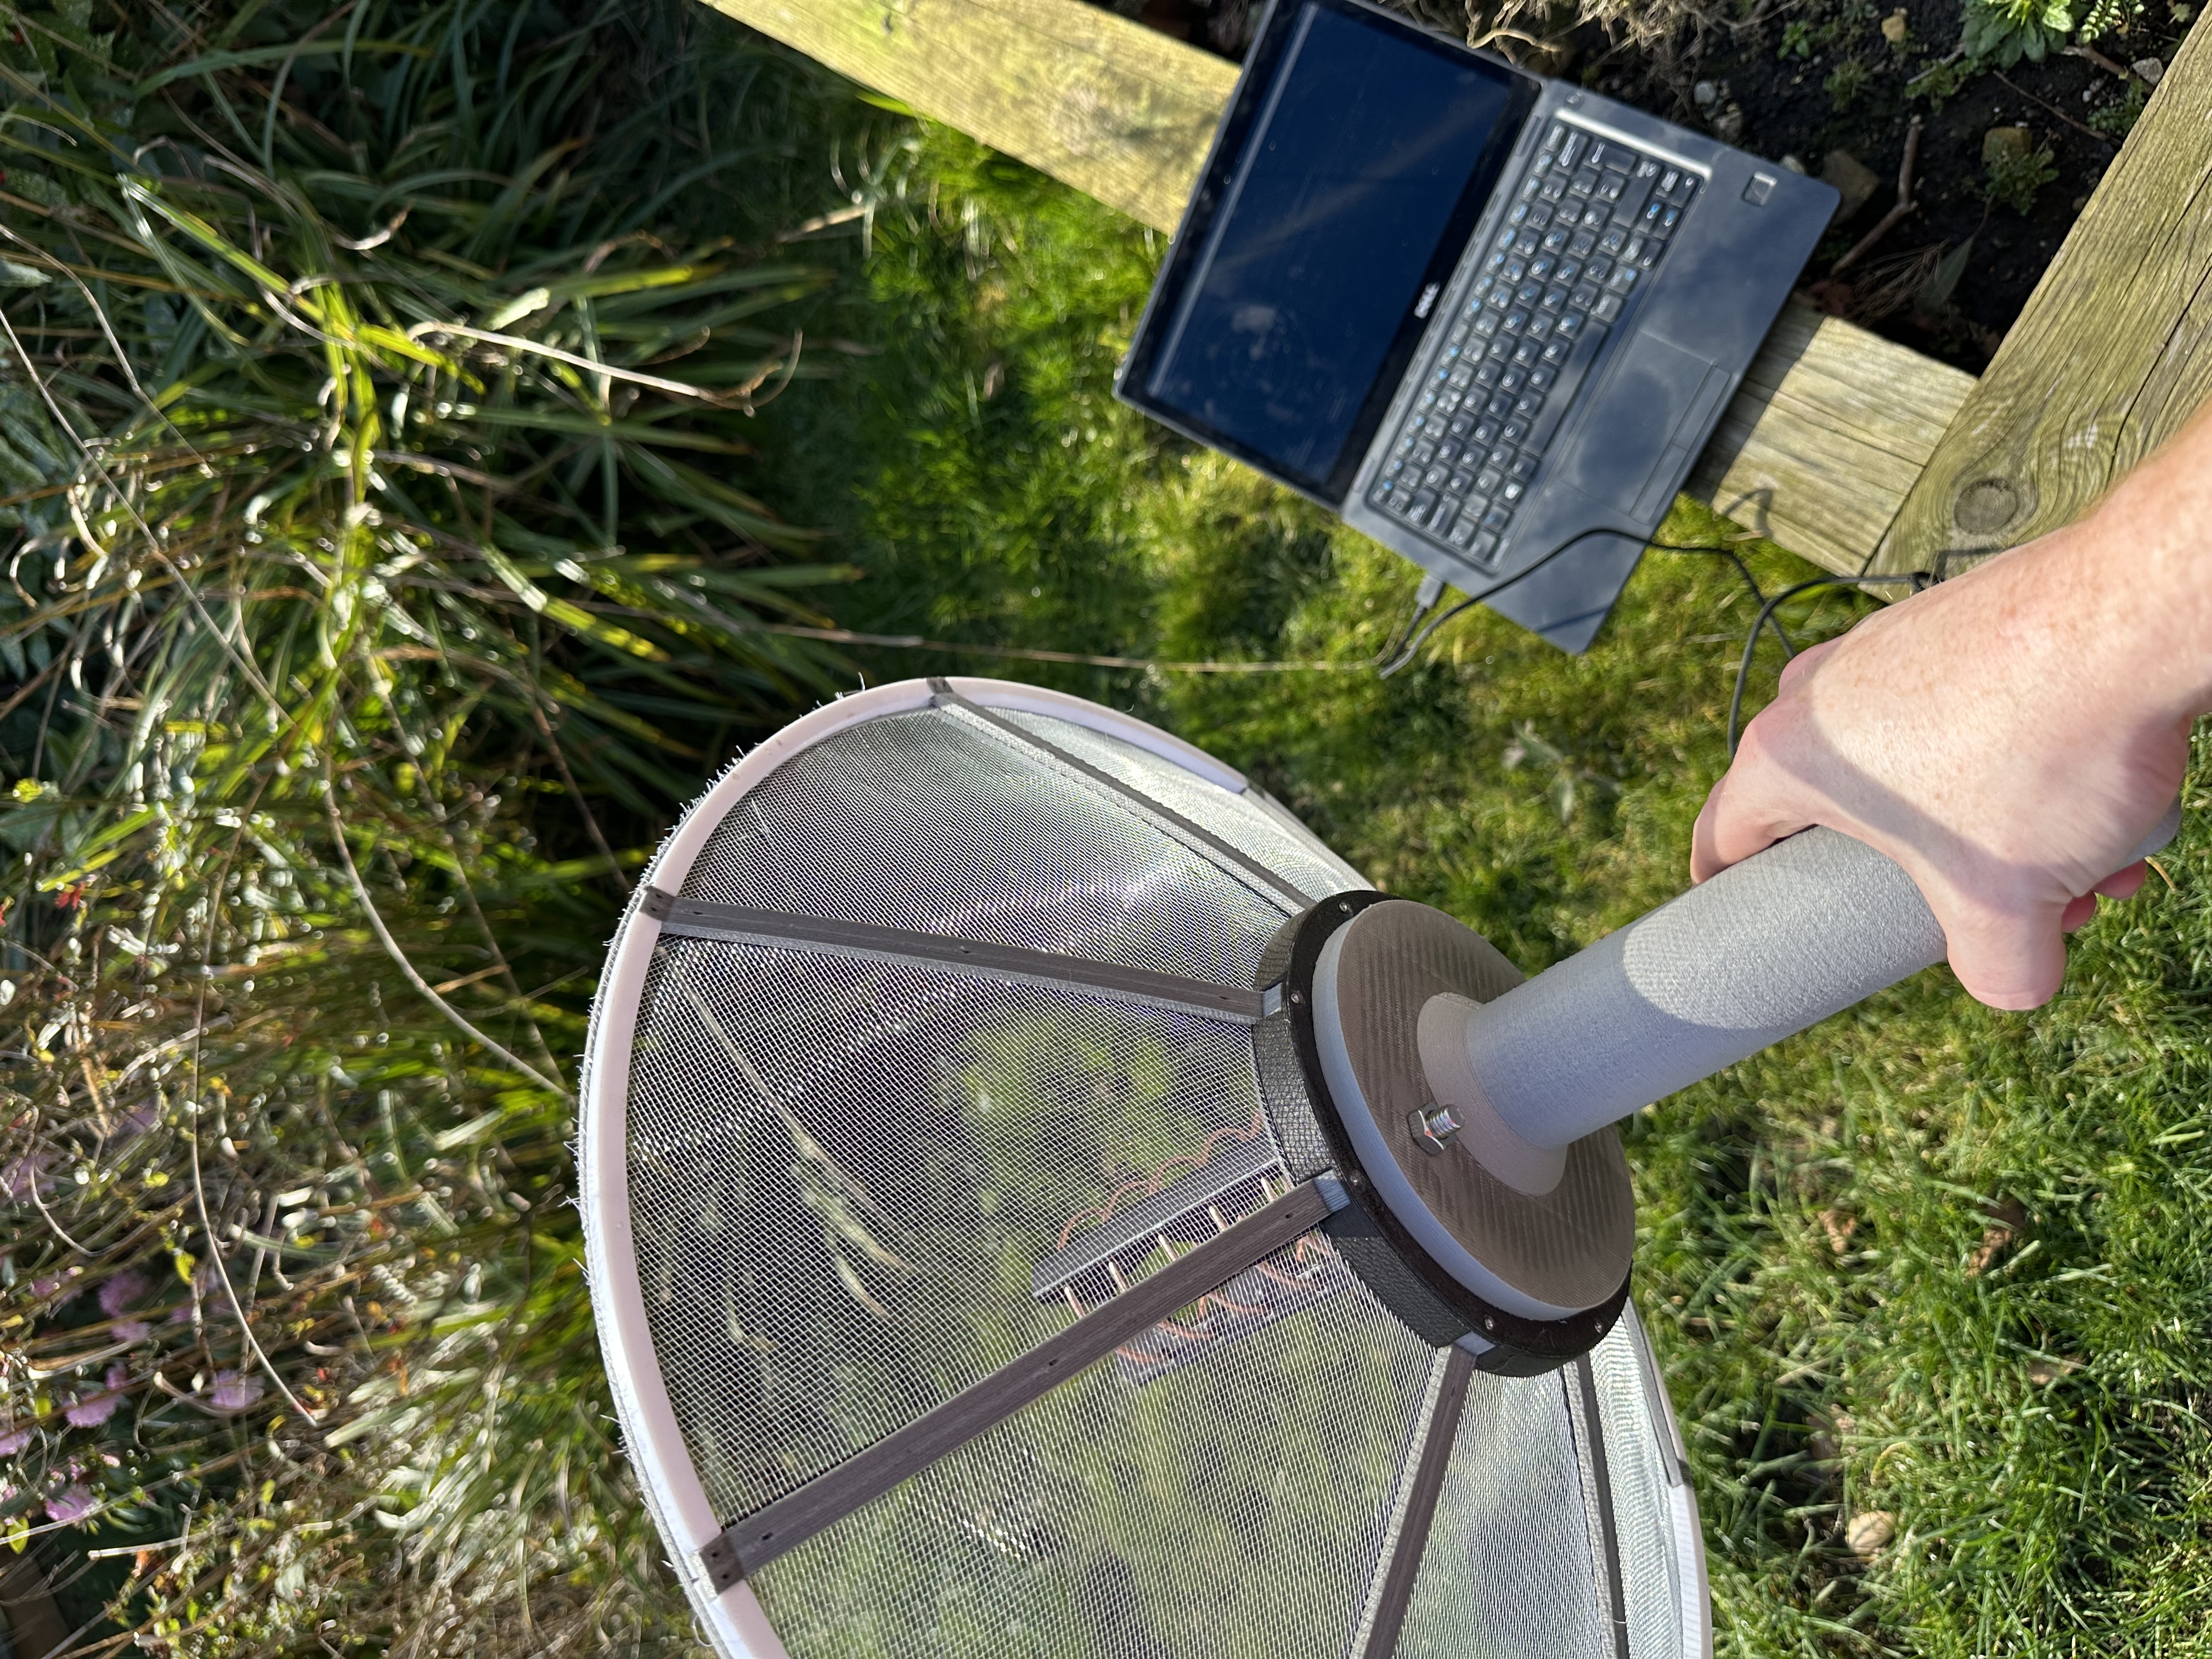
Capturing
Grab a phone app that can do satellite tracking by pointing it at the sky. It will help a lot.
Plug everything into your laptop, point your phone where it says to point it, then point the antenna at it.
If you do this correctly, the capture window in SatDump will show an increase in SNR and you’ll start capturing frames.
Your neighbours will think you are even more odd.
Analysis
Once you’ve captured some data, if you’re lucky SatDump will save it to the output directory that you have specified. This doesn’t always work for me, perhaps because I stop the capture early.
If not, the ‘Offline Processing’ tab is your friend, load up the baseband recording and the correct pipeline for the satellite your captured.
Some of the images will turn out upside down as it’s a South -> North orbit, but once you’ve fixed that, you get something like this:
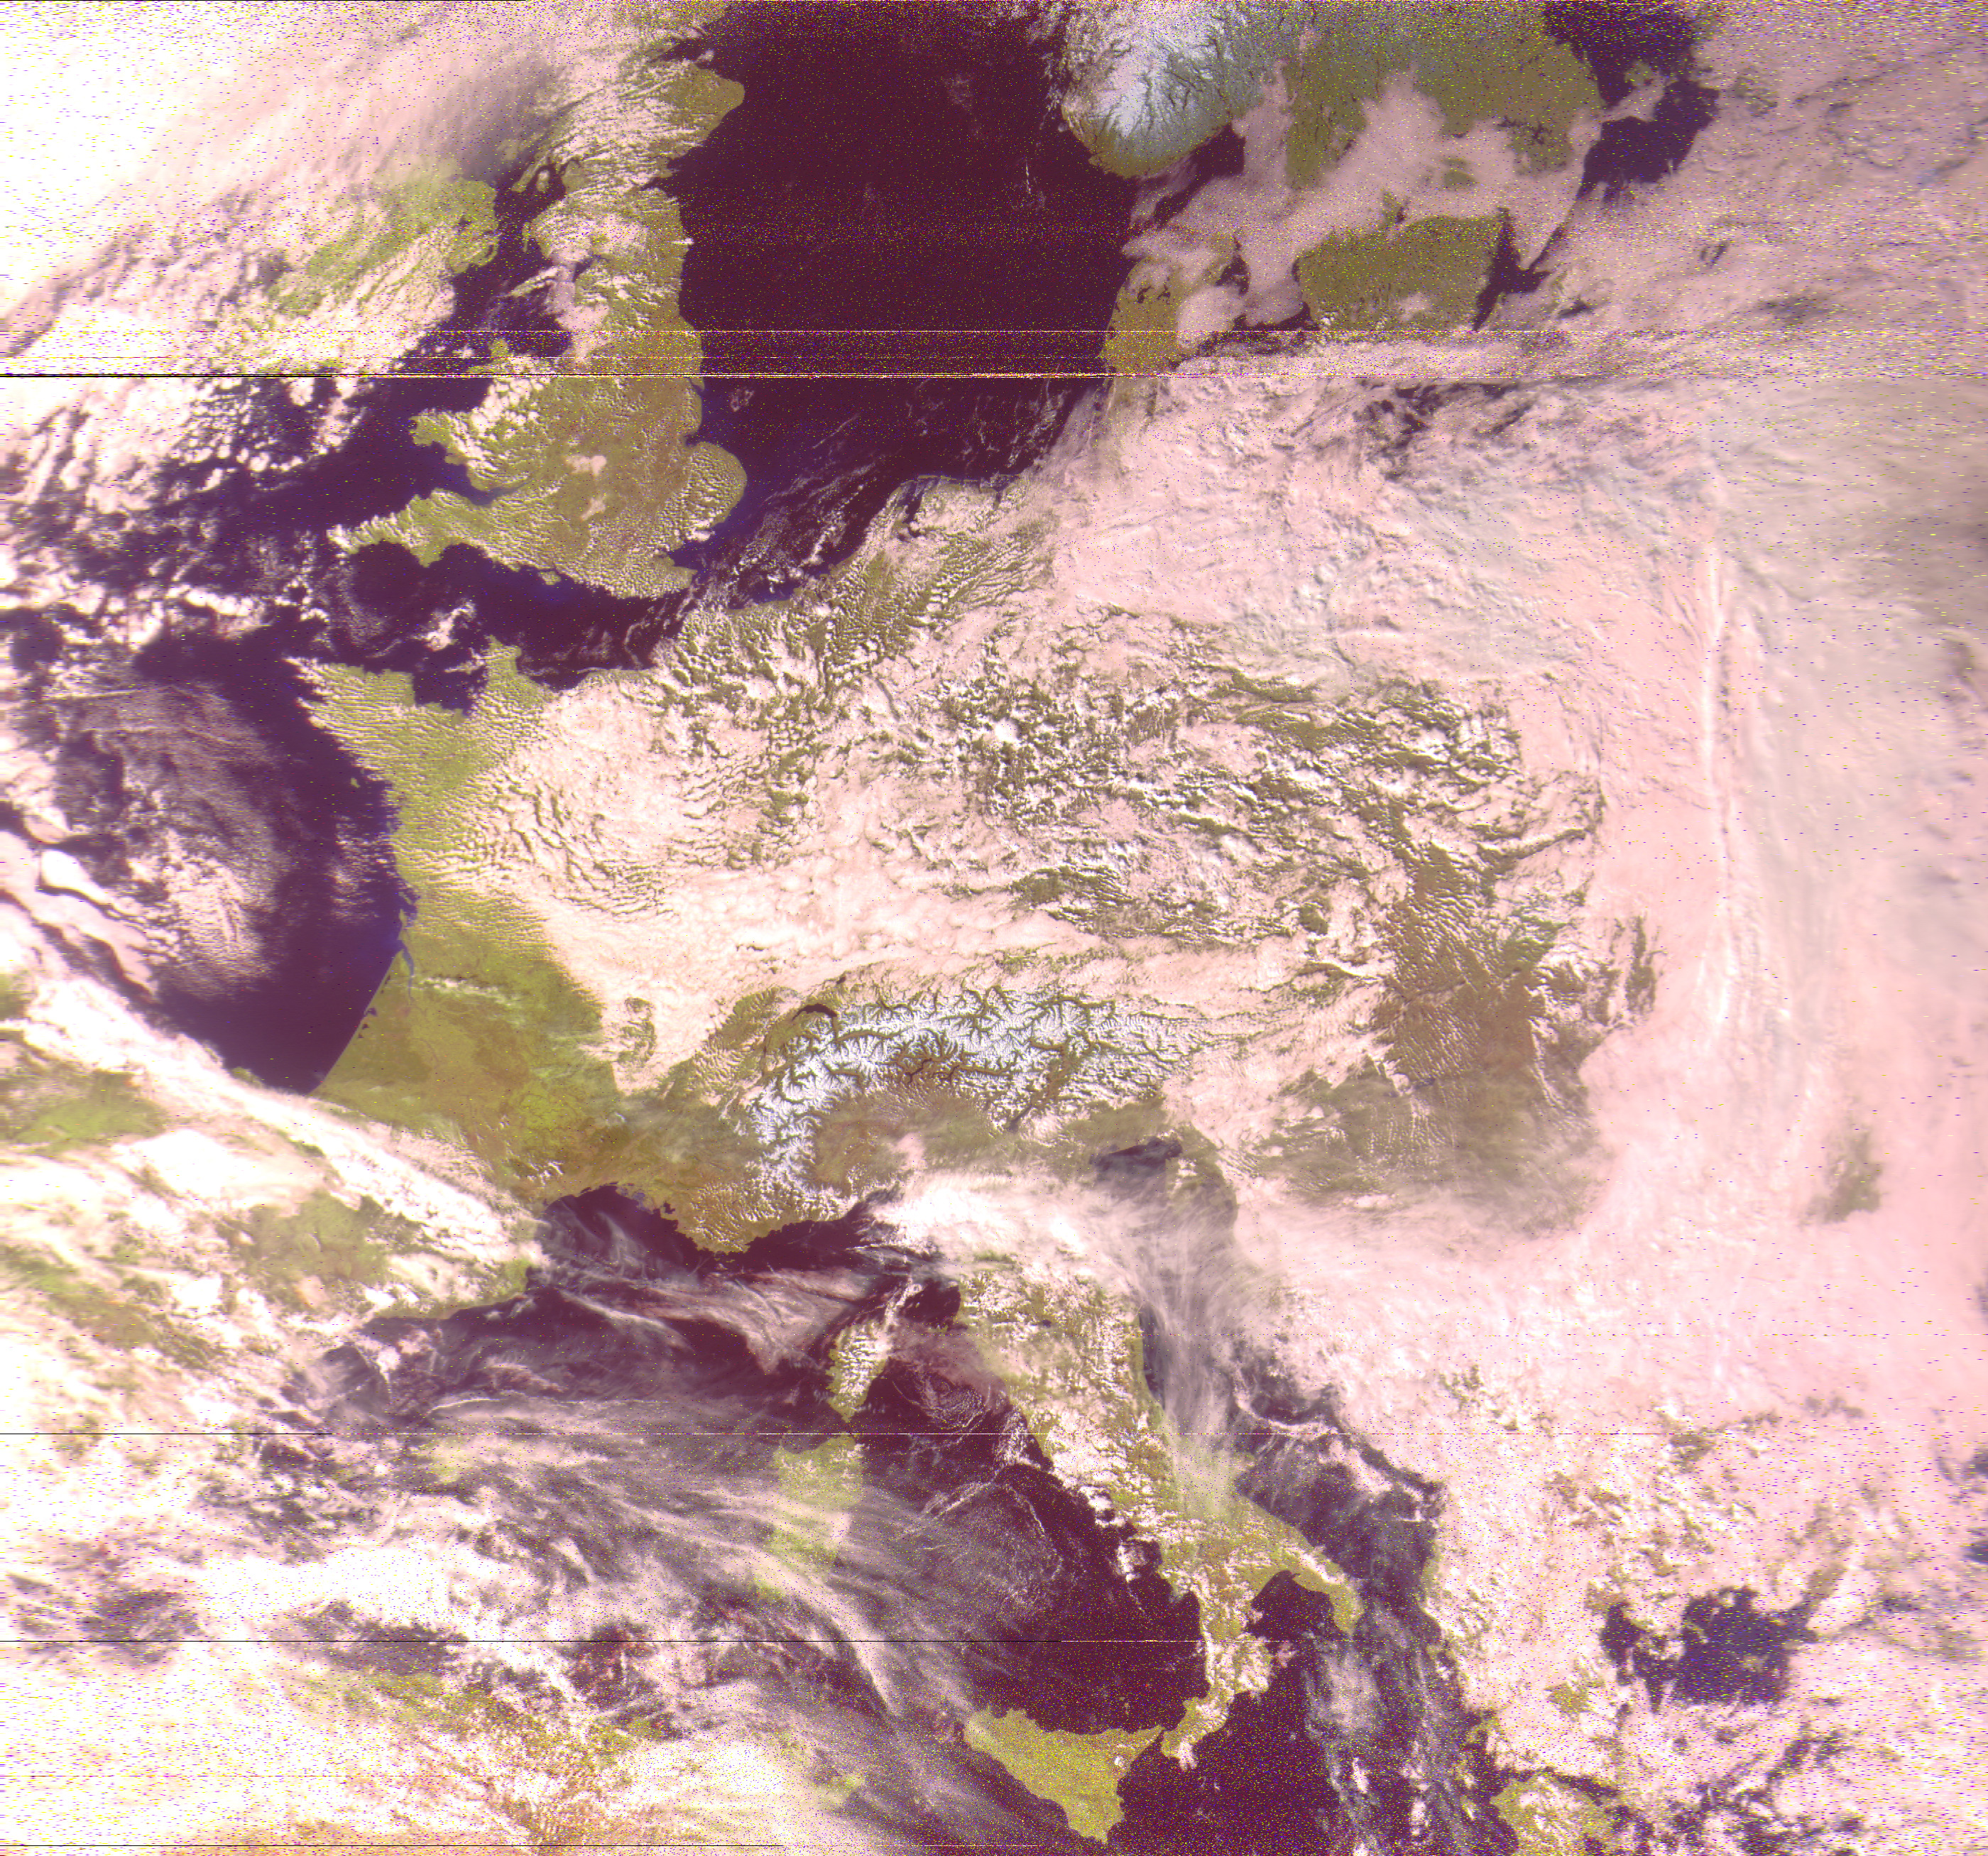
And now you know what the weather is, but slightly delayed and very awkwardly.
BOM
| Item | Source |
|---|---|
| NooElec NESDR SMArTee XTR SDR | https://www.amazon.co.uk/dp/B06Y1D7P48 |
| NooElec SAWbird+ GOES | https://www.amazon.co.uk/dp/B07K1M39H4 |
| Helix Wire | https://www.amazon.co.uk/dp/B0CHXQ1YWZ |
| M8 Bolts | https://www.amazon.co.uk/dp/B0CMTP3X12 |
| Self tapping screws | https://www.amazon.co.uk/dp/B09NDMWBC2 |
| Mesh | https://www.ebay.co.uk/itm/113278329503 |
| SMA mount | https://www.amazon.co.uk/dp/B09DSZ63GS |