Building a Balloon Tracking Cyberdeck
balloon radio pi cyberdeck aesthetics
As with a lot of my projects, this one started with a message:
David: “Sooo I think I want to launch a high altitude balloon…”
Me: “Sounds like fun! Why? Got plans?”
David: “I have this dream of sending a camera up really really high. From first attempts at research, looks to be plausible”
There was some scope creep.
The story of the balloon aspect of the project will be saved for another day, but this is about the tracking. The immediate question is “once you have launched a balloon, how do you get it (and your photos) back?”.
The answer to this is “put a radio on it that’s broadcasting GPS”. Again, this aspect will be explored later.
If you’ve put a radio on the balloon, then you need some way of tracking it from the ground. Fortunately, High Altitude Ballooning is a hobby of quite a few people and there’s a lot of precedence for how to do it. I chose to use the methods outlined and pioneered by the UKHAS and specifically, the lora-gateway from the PiInTheSky project, mostly authored by Dave Akerman and other contributors.
The tl;dr for the radio/software side is that LoRa radios are low power, high sensitivity data radios that can broadcast a string a very long way on very little power, assuming line of sight. The balloon has a transmitter, the ground station has a reciever that decodes the messages and does things like uploading the recieved position to a tracking site. There’s a bunch of hardware and software involved in this, but that’s the short form of it.
Ground Station
To chase the balloon, we need some way of recieving the data from it, decoding it, and then display the location. This needs to be able to be done while in a car or otherwise mobile as these balloons can potentially travel a very long way.
However, the hardware required to this is actually quite minimal. And it’s clearly not ~~A E S T H E T I C~~ enough for my synthwave-listening-hackers-watching inspiration, so lets make it MORE.
The minimal hardware:
- Raspberry Pi 4 - When the project was initially started lora-gateway only ran on older versions of raspbian, in 32 bit. It did not run on a Pi 5 at all. This has since been fixed.
- Uputronics Pi Hat - I got one with both 433 and 868 mhz chips as I wasn’t sure which I’d choose.
- Some form of GPS - It is handy to know where the chase car is in relation to the balloon
- Antenna - Ideally something magnetic to put on the roof of the car, in the correct frequency.
The Inspiration
At this point, I remembed reading about the Raspberry Pi Recovery Kit from Jay Doscher and remembered that I had a PeliCase of what looked to be appropriate size.
I joined Jay’s site and subscribed in the hope of reusing his work, but unfortunately, none of his designs were quite suitable. Both due to the requirement to have the radio antenna, and that the PeliCase I had was smaller than the one he used (1200 vs 1300). If you’re at all interested in this sort of thing, I’d strongly recommend checking them out, the designs are beautiful and the documentation is great. Just unfortunately not quite suitable for the unique use case I was facing here.
3D Modelling
I’m not very good with Fusion360, had an ongoing project to learn a bit more. This seemed an ideal starting place.
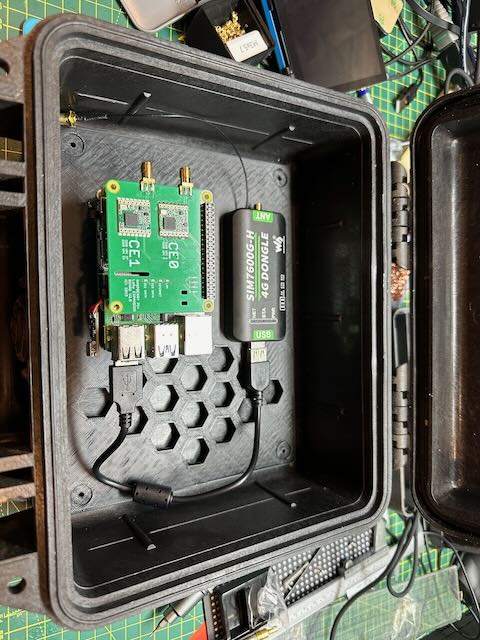
The plan for this was to have two ‘planes’ supported vertically with columns. The ‘base plane’ will contain the Pi stack and other accessories. The ’top plane’ will hold the screen, the connectors, and the switches.
Taking some measurements, I printed out a test frame to check fit.
That kind of worked after some tweaks, so with some calipers, some specs, and some iteration an initial design for the base plane arrived. At this point, I was hoping to have a 4G modem included in the whole box. Unfortunately, this didn’t pan out due to USB power issues, but there’s still space in the final design if I eventually find something that works.
Once that was built, it was on to the front place. Using a 7" touchscreen from Waveshare due to it being HDMI and usb based, as the LoRa hat prevents access to the GPIO pins that the official touchscreen uses.
The design intention here was to have a replaceable ‘antenna box’ as I wasn’t sure what antenna connections I would be using, nor how many radios would actually end up being used. The rest of it was styled along the lines of an army field radio, fitting around the stack of the main Pi components as necessary
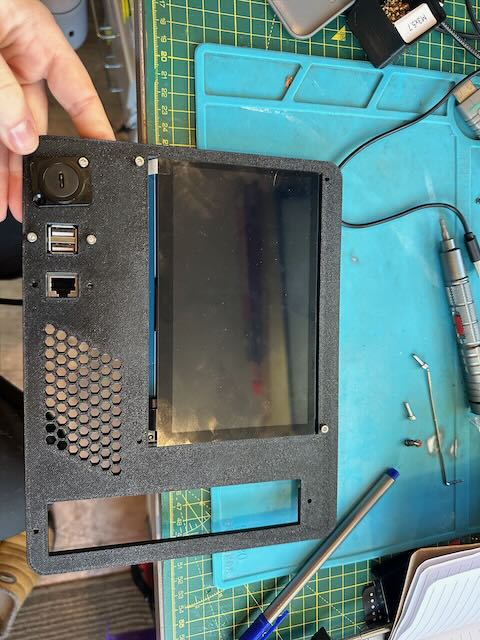
One of the hardest problems was finding appropriate pass through connectors that actually worked. USBC is a pain, you can buy the chassis connectors that should pass through, but they don’t actually work. I eventually swapped the one shown in the previous photo for a smaller one that worked more reliably.
This was a running theme for the project. I now own more USB-A, USB-C, and ethernet connectors and mounts than is ideal.
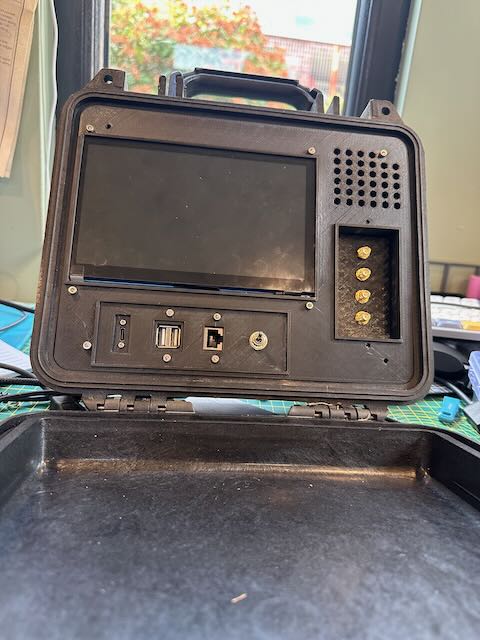
This fit nearly worked, it was a little too tall and the internal mounting didn’t work well. It’s also at this point that I learned about some different types of antenna connectors, and the fact that the antenna I was hoping to use for the 433Mhz LoRa radio had a SO239 connector, rather than the SMA. This is also just before I removed the 4G modem, meaning the number of antenna connectors dropped by one in the final version.
I was using the GPS built on the 4G modem (another Waveshare item), but I swapped that out for a GPS module with an onboard serial UART.
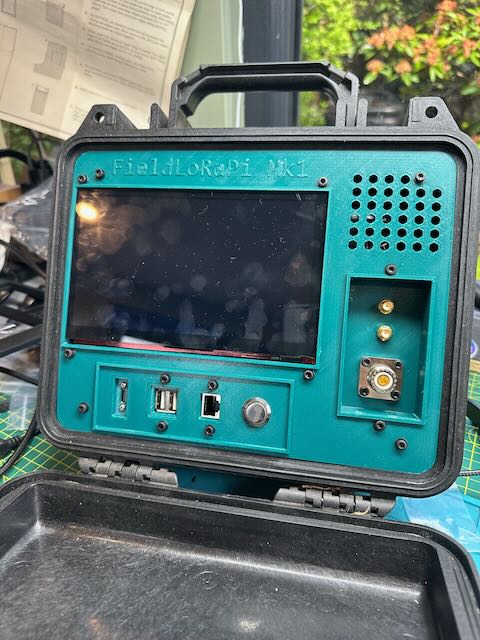
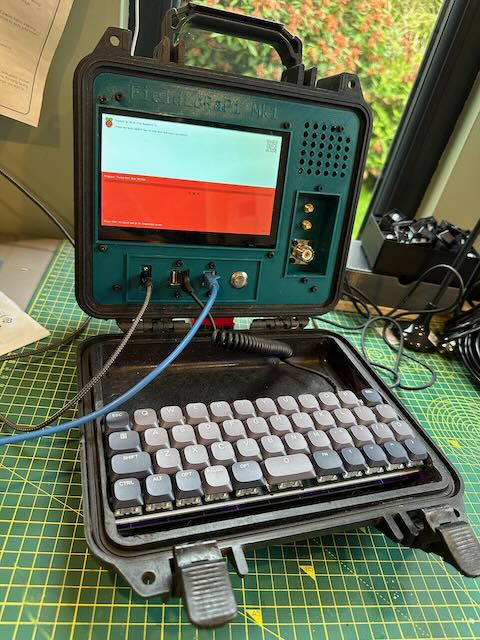
And then I decided it needed to be more green. In some photos it kind of looks like Soviet Aeronautical Green, but it’s a different shade in real life. I also gave it a title.
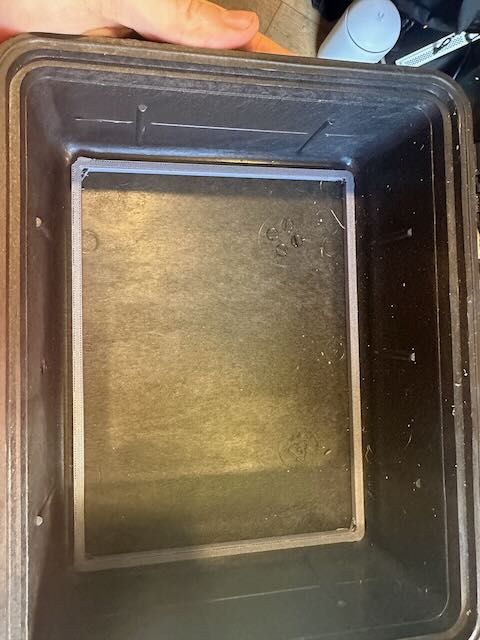
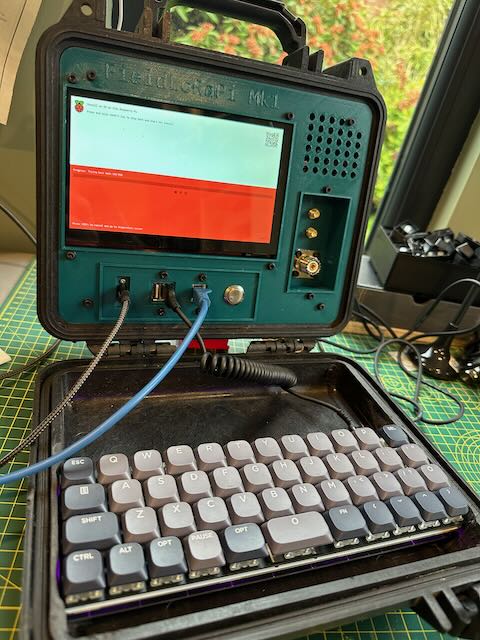
And finally, a keyboard. Specifically, a UT47.2 kit that was 3mm too wide to fit the case, so I broke with my original principles and chopped a bit off the inside rim of the case. It still seals as the outside is still original.
The keyboard was chosen as a good tradeoff between fitting in the case and being usable. A 40% keyboard would fit without modifications, but I’m not very good at using a keyboard that small, so I didn’t go with it in the end.
Final Specs
- Raspberry Pi 4 8Gb
- 128Gb Samsung SD Card
- Peli-Case 1200
- Waveshare 7" touchscreen
- Uputronics LoRa Hat in 433 and 868mhz
- GeeekPi UPS shield
- UT47.2 keyboard
- Unbranded GPS module
Of course, I’ve already disassembled it and looking at replacing the UPS with something that allows the battery information to be read from the Pi, and ported the lora-gateway so it’ll run on the Pi5.
There may be a Mk2 and a Part 2 for this blog yet.